
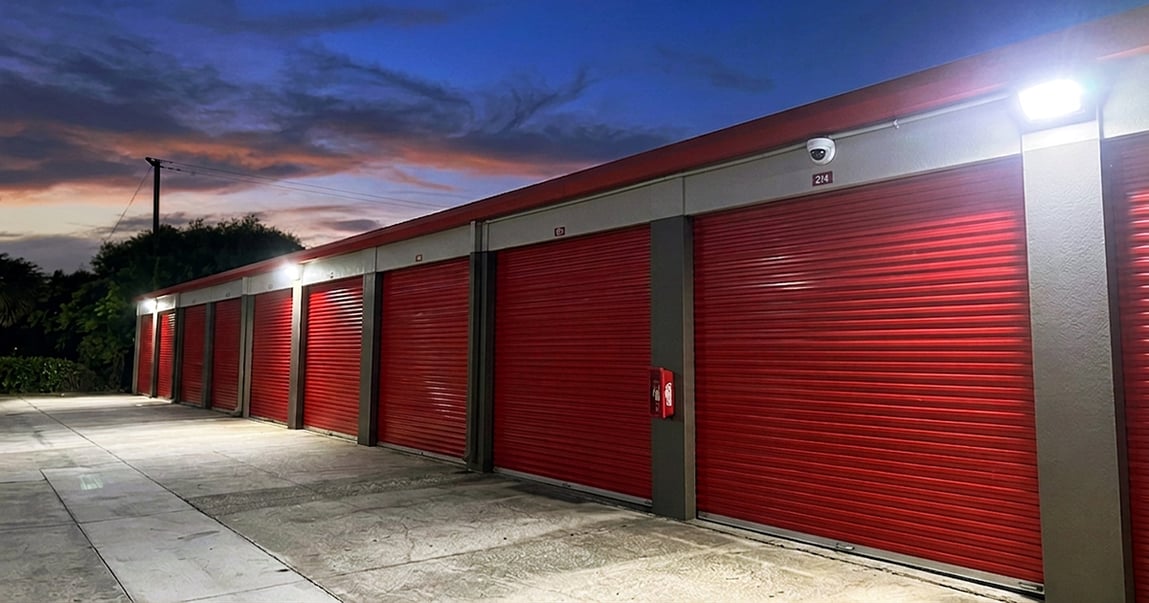
Strategic LED lighting and motion controls are essential to eliminate dark spots, improve camera visibility, and strengthen security throughout your facility.
A security camera is only as effective as the lighting supporting it. If you review footage after an incident and find that shadows or poor visibility make the recording unusable, you lose both evidence and deterrence. This scenario is more common than many operators realize.
Security cameras deter theft, support investigations, and reassure customers that their property is protected. To achieve these outcomes, facilities need strategic LED lighting and motion-activated controls that eliminate blind spots and give cameras the visibility required for clear, actionable footage.
This practical guide outlines the steps to develop parking lot and perimeter lighting that improves nighttime visibility and supports your surveillance system. The recommendations are based on proven strategies for self-storage security and camera performance.
Quick Guide: How to Light Self-Storage Lots for Security Cameras in 7 Easy Steps
-
Assess Your Facility Layout and Identify Lighting Zones – Map your parking lots, drive aisles, and perimeter areas to determine coverage needs.
-
Choose the Right Color Temperature for Camera-Friendly Lighting – Select 5000K LEDs for maximum image contrast, sharpness, and optimal camera performance.
-
Select Appropriate Lumen Output for Uniform Coverage – Maximize light distribution based on mounting height, specifically wall packs on perimeters and area lights on poles.
-
Position LED Luminaires to Eliminate Shadows and Blind Spots – US LED offers lighting layouts that ensure luminaire placement maximizes distribution and maintains appropriate footcandles on the ground.
-
Integrate Motion-Activated Controls for Security and Energy Savings – Add occupancy sensors that adjust light levels when movement is detected and dim when there is no activity.
-
Install LED Luminaires With Proper Mounting and Aiming – Install and angle LED luminaires based on manufacturer recommendations to reduce glare while maximizing illumination.
How to Design Motion-Activated LED Lighting for Self-Storage Parking Lots and Perimeters
1. Assess Your Facility Layout and Identify Lighting Zones
Start by walking your entire property at night and take detailed notes. Document every parking area, drive aisle, building perimeter, and entry point where tenants or vehicles move after dark. Be sure to mark any existing dark spots or areas known to have shadowing.
Create a simple site map that divides your property into specific zones: high-traffic areas like main entrances and rental offices, medium-traffic zones like drive aisles between buildings, and low-traffic perimeter areas. Each zone will have different lighting requirements based on how often people access it and how critical camera coverage is for that area.
The overall goal is to standardize your lighting and create uniform illumination across all zones. This removes dark pockets where intruders can hide and eliminates overlit areas that could wash out camera footage. This type of assessment forms the foundation of your lighting design.
2. Choose the Right Color Temperature for Camera-Friendly Lighting
Correlated Color Temperature (CCT) affects a space's visual appearance and biological impact. In fact, it strongly influences human perception and camera performance. For self-storage security lighting, choose LEDs with 5000K CCT. This CCT produces a neutral, crisp white light that renders colors accurately with sharper details—critical for identifying vehicles, clothing, and facial features.
Lower CCTs around 2700K-3000K create warmer white light better suited for residential and indoor hospitality applications. While it can create a cozier atmosphere, it creates a slightly yellowish tint that reduces contrast in surveillance footage. CCTs above 5000K can be detrimental, as they can wash out video and blind the sensor. Higher CCTs also tend to produce a more intense, bluish light that can hinder natural human night vision and may cause friction with neighbors.
5000K CCT is a natural sweet spot for commercial lighting because it allows maximum image contrast and optimal camera performance. Most modern IP cameras and HD CCTV systems perform optimally with this CCT. Areas feel brighter, and visibility is at a level where customers feel safer and more secure while visiting.
3. Select Appropriate Lumen Output for Uniform Coverage
Exterior lighting requirements vary across a self-storage property, so specifying the right LED luminaire is critical. Focus on output, optics, mounting height, spacing, and installation methods to ensure consistent results.
For drive aisles with opposing buildings, specify outdoor wall packs delivering 5,000 to 6,000 lumens. Alternate fixtures along each side of the aisle and space them properly to reduce dark areas and maintain visibility for both tenants and cameras.
Parking lots require higher-output area lighting. Use area lights with square IES Type 5M distribution and at least 47,000 lumens for uniform coverage. For targeted exterior coverage, specify floodlights in the 15,000 to 20,000 lumen range.
Evaluate lighting for critical locations such as drive entrances, loading docks, and areas outside retail offices as part of your lighting layout. While general standards apply, select luminaires for these areas based on the unique conditions of each property.
The most important factor for the best lighting possible is focusing on foot-candle measurements at ground level rather than just lumen output. Industry guidelines from the Illuminating Engineering Society (IES) recommend a minimum maintained illumination level of 0.5-1 foot-candles for low-activity parking areas, with higher levels near building entrances and camera locations.
4. Position LED Luminaires to Eliminate Shadows and Blind Spots
Placement and installation determine whether you achieve uniform coverage or create new problems. For drive aisles, alternate luminaires on opposite sides every 40 feet along door jambs and building walls. This pattern eliminates dark zones and keeps consistent coverage across the entire width of the aisle.
For perimeter lighting facing a fence with no opposing buildings, mount area lights with IES Type 3 distribution and space them every 80 feet. Angle and space fixtures to achieve illumination up to 6 feet on the fence. For perimeters next to neighborhoods, use full-cutoff wall packs to provide coverage without spillover into adjacent properties. This approach supports camera coverage and helps meet municipal requirements for minimizing light pollution.
5. Integrate Motion-Activated Controls for Security and Energy Savings
Motion-activated lighting reduces energy use during low-activity periods and acts as a deterrent when someone enters the area. When lights brighten in response to movement, it signals to intruders that they have been detected and draws attention to unexpected activity. This adds one more layer of awareness across your property.
What are the typical sensors? Passive Infrared (PIR) sensors are used for precise directional zones like doors or gates, while microwave sensors can cover wider driveways and parking areas where more sensitive coverage is needed.
Install occupancy sensors to maintain a baseline light level of 30 to 50 percent during idle hours, then ramp up to full brightness when motion is detected. Configure bi-level dimming to keep lights at full output for about five minutes after the last movement, giving tenants or employees time to complete their business without lights cycling off too soon.
According to industry research, motion sensors can reduce energy consumption by an additional 20–30% beyond the savings already achieved by switching to LED technology. For a large self-storage facility running lights around the clock, that represents meaningful savings on your monthly utility bills. Learn more about reducing energy costs in self-storage facilities.
6. Install LED Luminaires With Proper Mounting and Aiming
If your lighting is not installed correctly, it will not deliver the results you need. Installation quality directly impacts lighting performance and camera footage. Mounting luminaires too high may obscure faces, while incorrect aiming can cause glare that blinds cameras.
For simple replacements or swapping out existing fixtures, many facility teams can handle the work in-house if they are comfortable with electrical basics and follow safety procedures. However, for new installations, wiring adjustments, complex aiming, or designing layouts to avoid shadows and glare, it is best to hire a professional lighting partner. Professionals ensure luminaires are installed and aimed according to the lighting layout for optimal camera performance, reducing the risk of costly errors and keeping your facility up to code.
7. Test and Verify Camera Footage Quality Under New Lighting
The final step is to review your security camera footage under the new lighting. Schedule a nighttime walkthrough after installation and review footage from every camera angle the next day.
Look for these quality indicators: Can you clearly identify facial features at entry points? Can you read license plates in parking areas? Are colors accurately rendered, or does footage appear washed out or tinted? Are there any remaining dark spots or glare problems?
If you identify issues, work with your installer to make adjustments. Repositioning a fixture or adjusting its aim often solves coverage gaps. In some cases, adding a fixture in a specific location eliminates a remaining blind spot.
Include security lighting checks in your routine facility inspections. Look for failed fixtures, new dark spots, or coverage changes that could reduce visibility and camera performance. Address complications promptly to prevent lighting weaknesses from becoming security vulnerabilities.
The goal is footage that law enforcement and insurance providers can actually use if an incident occurs. After a security incident, review lighting and camera coverage in the affected area to identify dark spots, visibility issues, or other weaknesses that may need correction.
What Color Temperature Works for Security Cameras?
Security cameras perform differently across light spectrums, shifting from full-color video in bright daylight to high-contrast monochrome images under infrared light at night. Most modern cameras are designed to capture the visible light spectrum plus near-infrared wavelengths. For standard surveillance without IR illumination, color temperatures between 4000K and 5000K deliver optimal image quality.
This range balances several factors. It renders skin tones and clothing colors accurately, which helps with identification. It creates sufficient contrast between objects and backgrounds, making movement easier to detect. It also produces comfortable light for tenants who access facilities after dark.
Warmer temperatures (below 4000K) reduce contrast and can make footage appear orange or brown. Cooler temperatures (above 5500K) increase harshness and can create eye strain for anyone working under the lights for extended periods. Because of that, most self-storage facilities standardize on self-storage lighting with 5000K CCT.
Do LED Lights Interfere with Security Camera Night Vision?
Standard LED luminaires do not interfere with security camera night vision. In fact, they often improve it. Concerns about interference usually involve cameras with built-in infrared illuminators operating in complete darkness.
When ambient LED lighting is present, most cameras switch from infrared mode to standard color capture. This transition often produces better footage for identification because it adds that color information for greater context. You can see a vehicle's color, the pattern on someone's clothing, or other details that IR footage cannot capture.
If your facility uses a combination of lit and unlit areas, ensure your cameras have automatic day/night switching. This allows them to adapt as lighting conditions change. For areas where you want cameras to remain in IR mode, you can install fixtures with shielding that directs light away from the camera lens while still illuminating the ground plane.
How US LED Helps You Design Self-Storage Security Lighting?
US LED specializes in manufacturing and installing outdoor LED lighting solutions engineered for commercial and industrial applications, including self-storage facilities. The approach starts with understanding your specific security requirements, not just your lighting needs.
US LED offers complete turnkey project support, from initial on-site audits to lighting layouts and rebate harvesting. The team designs solutions that integrate with virtually any motion-activated control, deliver camera-friendly color temperatures, and provide uniform coverage across your entire property. US LED rigorously tests every luminaire before shipping and backs its products with an industry-leading Ten-Year Warranty.
For self-storage operators managing multiple locations, US LED coordinates nationwide rollouts with a single point of contact. They handle rebate management to help offset your upfront investment and deliver ROI analysis so you can see the financial impact before you commit. Read more in the complete guide to self-storage lighting retrofits or contact US LED today to schedule a professional lighting assessment for your facility.
FAQs About How to Light Self-Storage Lots for Security Cameras
How many lumens do I need for self-storage parking lot lighting?
Most self-storage parking lots require LED luminaires delivering at least 47,000 lumens, depending on mounting height and spacing. Higher mounts need larger luminaires to achieve adequate ground-level illumination. US LED helps you calculate exact specifications based on your facility layout.
What is the minimum foot-candle level for security camera footage?
Industry guidelines recommend at least 0.5-1 foot-candle at ground level for low-activity parking areas, with higher levels near building entrances and camera locations. US LED designs lighting layouts that meet or exceed these recommendations for clear, usable surveillance footage.
Should I use motion-activated or always-on lighting for security?
A hybrid approach works well for self-storage: maintain baseline illumination at around 30-50% during quiet idle periods, then increase to full brightness when motion is detected. This strategy saves energy while deterring unauthorized activity. Motion sensors can reduce energy use by 20–30% beyond LED savings alone.
How far apart should I space parking lot light fixtures?
Space wall packs every 40 feet along drive aisles and building perimeters. Stagger placement on opposite sides of driveways for optimal coverage. For perimeters that face a fence with no opposing buildings, space area lights every 80 feet. For perimeters adjacent to a neighborhood, use full-cutoff wall packs to reduce light pollution. US LED creates photometric studies that determine exact spacing based on lumen output and mounting height to accommodate your camera locations.
Will LED lighting help reduce insurance costs for my facility?
Many insurance providers recognize that well-lit facilities experience fewer incidents. Improved lighting supports clearer security footage, which helps with claims documentation. While rate reductions vary by carrier, self-storage operators often report that their insurance representatives view lighting upgrades favorably during policy reviews. To maximize potential benefits and avoid any surprises, check with your insurance agent about possible discounts, documentation requirements, or specific lighting standards your provider may have.
How long do LED parking lot lights last?
Typical LED luminaire lifetimes are 50,000 to 100,000 hours (L70). US LED has always manufactured ultra-long-life solutions approaching 200,000 hours that significantly outlast standard options. This extended lifespan eliminates frequent replacements and reduces maintenance costs over the life of your investment.